Installation
Before we start anything make sure take backup files and database of current state to prevent any problem in future we are not responsible for any damage you made later.
Minimum Requirement:
PHP Version 5+
MySQL Version 5.1+
WordPress 3.x or later
eCommerce Plugins Woocommerce
Installation:
Download theme file from My Account – Download section http://www.insertcart.com/my-account/ (If you are having any problem in download then contact us) after download upload main theme your-theme-file-name.zip via FTP or WordPress upload. As ftp software you can use Filezila or any other ftp client. if you are upload via WordPress upload then navigate to:
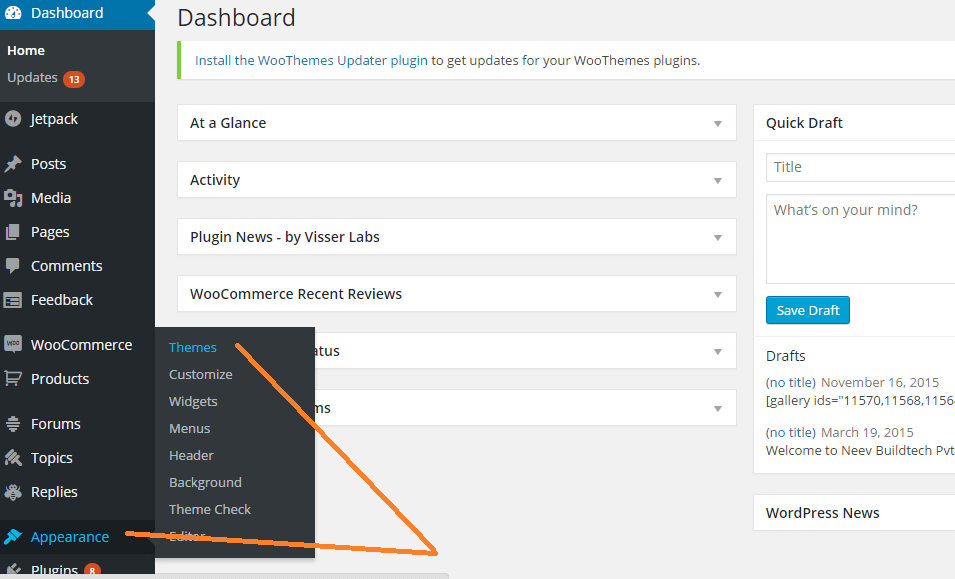
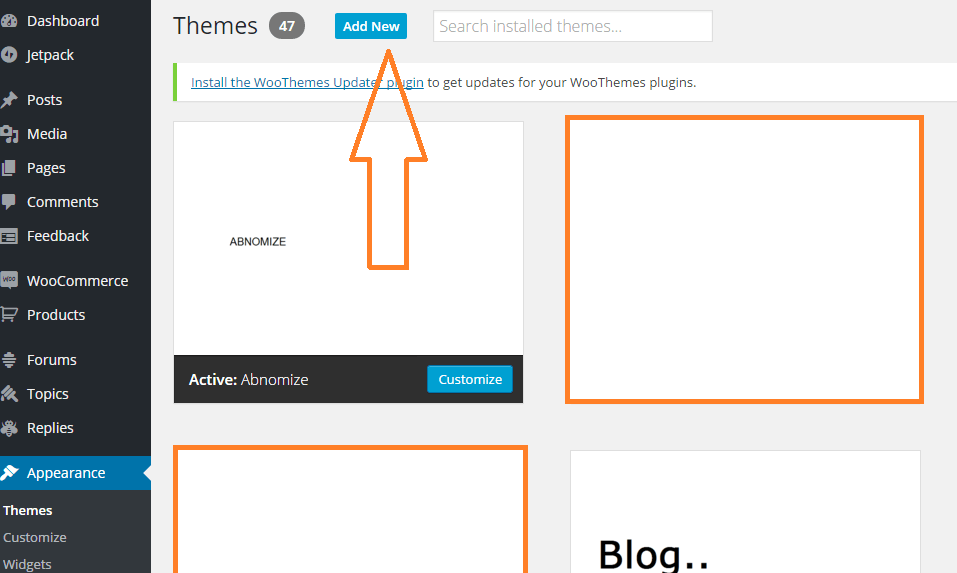
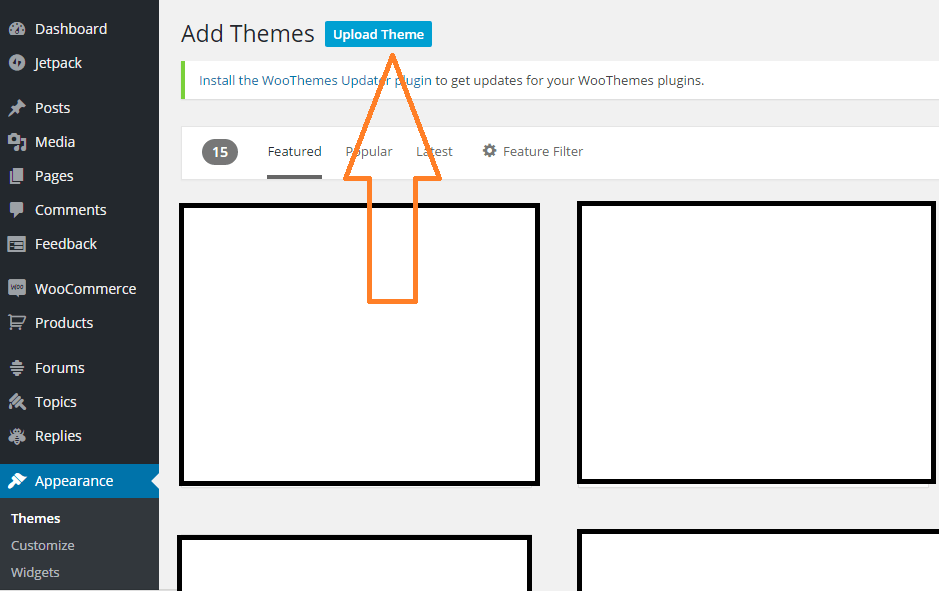
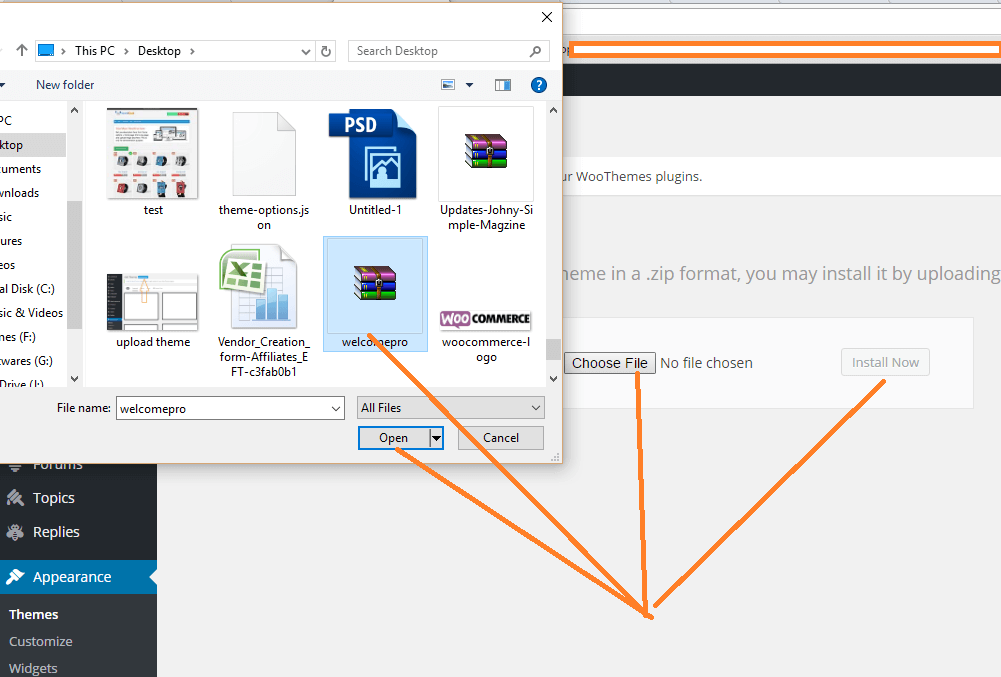
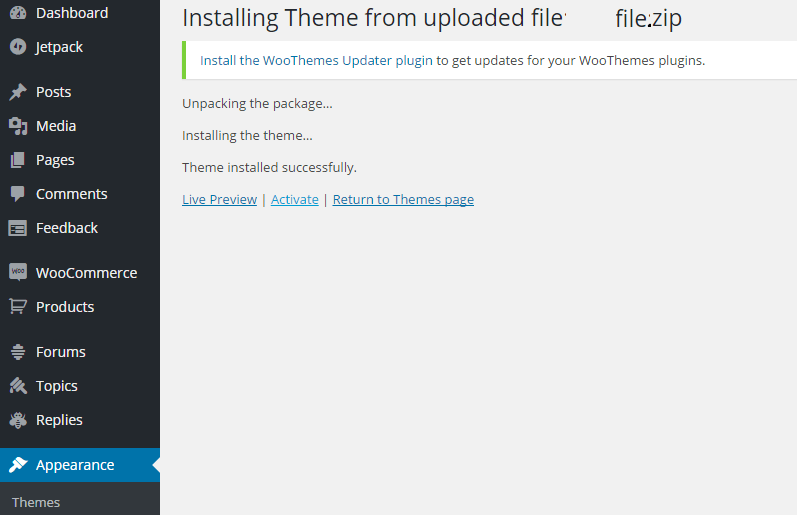
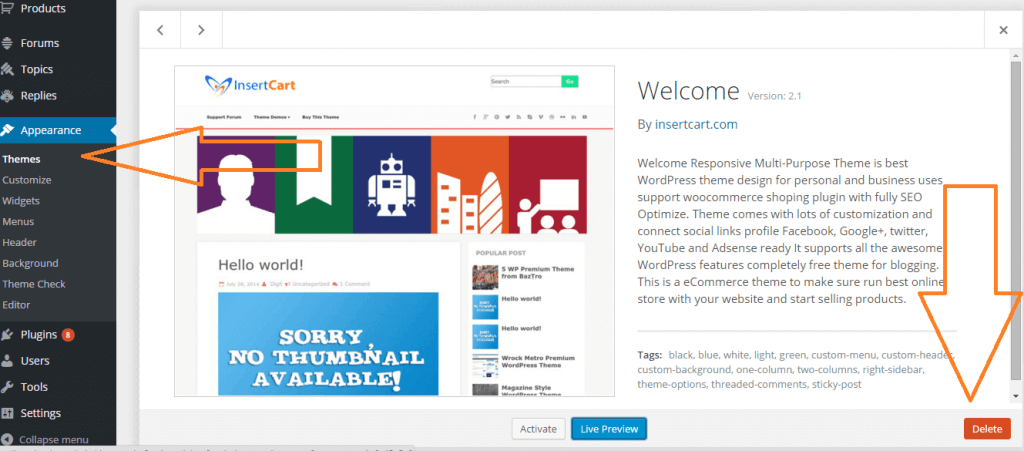
After login into website Dashboard > Appearance > Theme > Add New > Upload Theme > Choose file > Install now. After successful upload Activate the theme.
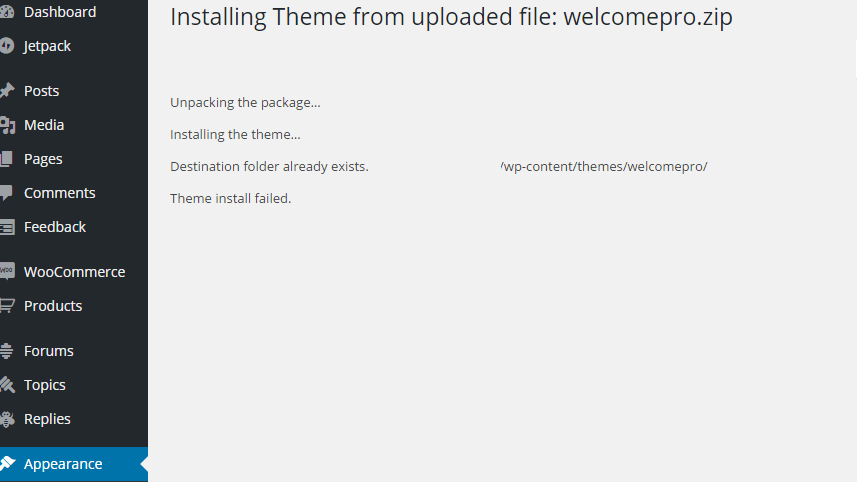
In any case if you get error like theme file or folder already exist then you need to remove previous version first.
Please Note: You must disable any caching plugin (like: w3tc, wp super cache) while setup theme because result might have some delay or not be visible.
Also for first time setup you should restore default theme option to prevent any error or wrong value saved on database.
Some of option doesn’t work for Free Version of theme user you need to Pro Version of theme to work all these options Purchase here
Please Note: Some Times we update theme and Add or move options.
- Introduction to Theme Customizer
- Access WordPress Customizer
- Site Identity – Logo & Favicons
- Setup Navigation Menu
- Add Icon to Navigation Menu
- How to Setup Categories on the Front/Index Page
- Display image of post thumbnail or featured
- Adding Hero Slider to Theme
- Adding Hero Canvas Widget
- Latest and Popular Post Widget Configure
- Selecting Post and Page Layout
- Change width of diff. area Sidebar, content area etc.
- Older Version of Theme Options
To access Customizer navigate from top admin bar Or Just go to Dashboard > Appearance > Customize
Introduction to theme options.
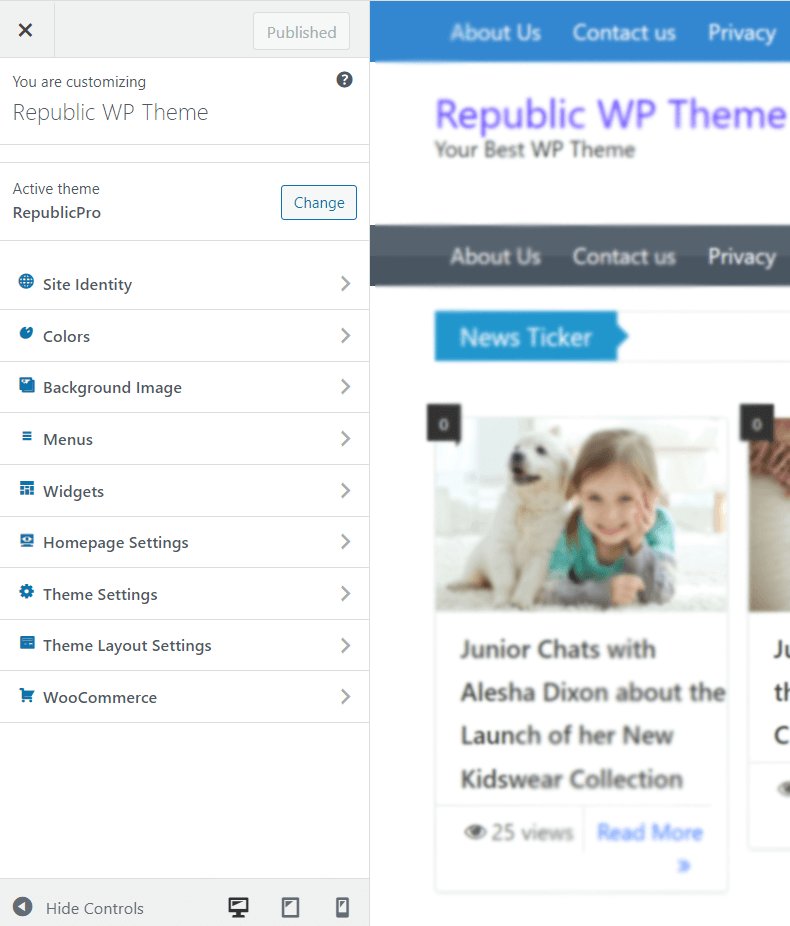
- Site Identity – Use to set website Logo & Title
- Color – To control background color
- Background Image – As the name suggests it allows you to set website background image
- Menu – Menu option allows you to set navigation menu for different WordPress areas.
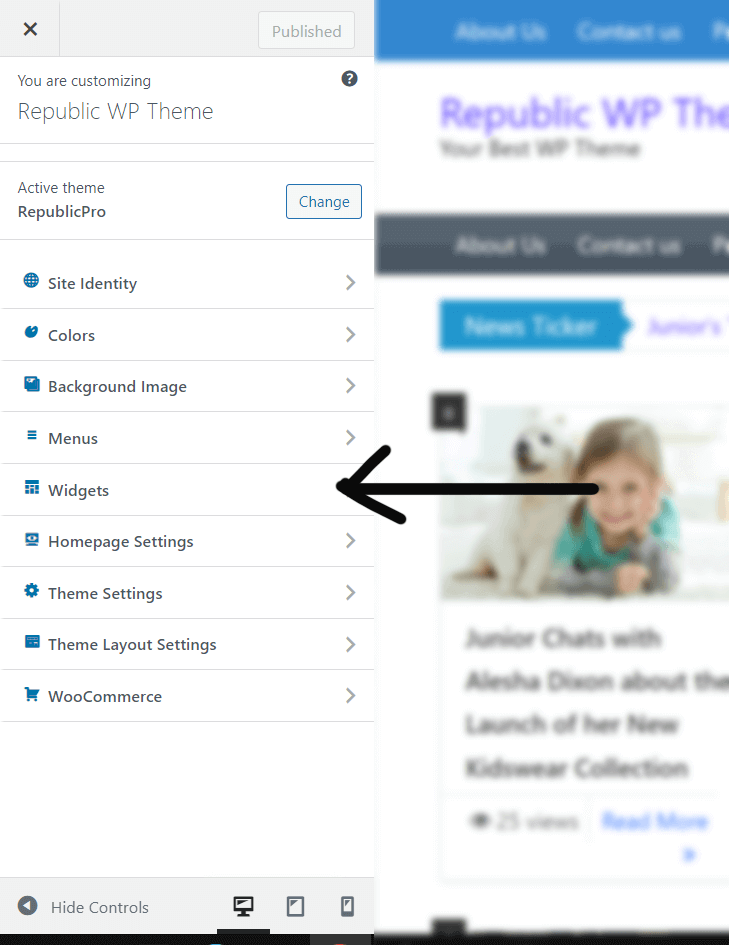
- Widgets – Website support many widget areas Header, Sidebars, Index, Footer etc
- Home Page Settings – This allow you to select your custom page to home page and blog page separately
- Theme Settings – It controls theme settings for different areas
- Theme Layout – It control layout and design for website like sidebar position, menu style
- WooCommerce – All settings related to WooCommerce are here, Except some are in Theme Settings to control menus in header
You can access it by logging into your WordPress admin area, and then going to Appearance » Customize from the left sidebar of your WordPress admin panel. This will open the Customizer interface with your current theme.
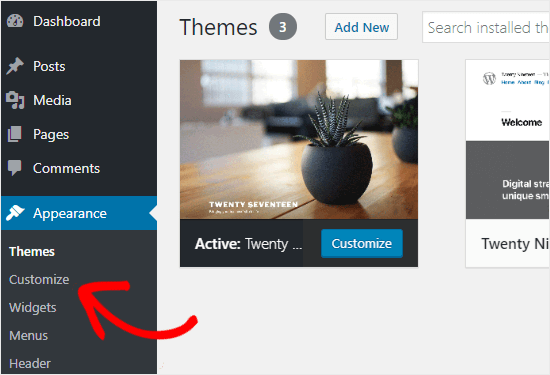
You can also use the WordPress theme customizer page for any of the installed themes on your website even when they are not active.This allows you to see a live preview of that theme and make changes before you activate it.
To do that, you need to head over to the Appearance » Themes page.
The Site Identity panel in the WordPress theme customizer allows you to add or change the Title, Tagline, and Logo of your website.
By default, WordPress adds “Just Another WordPress Site” as the site tagline. You can also keep it blank if you want.
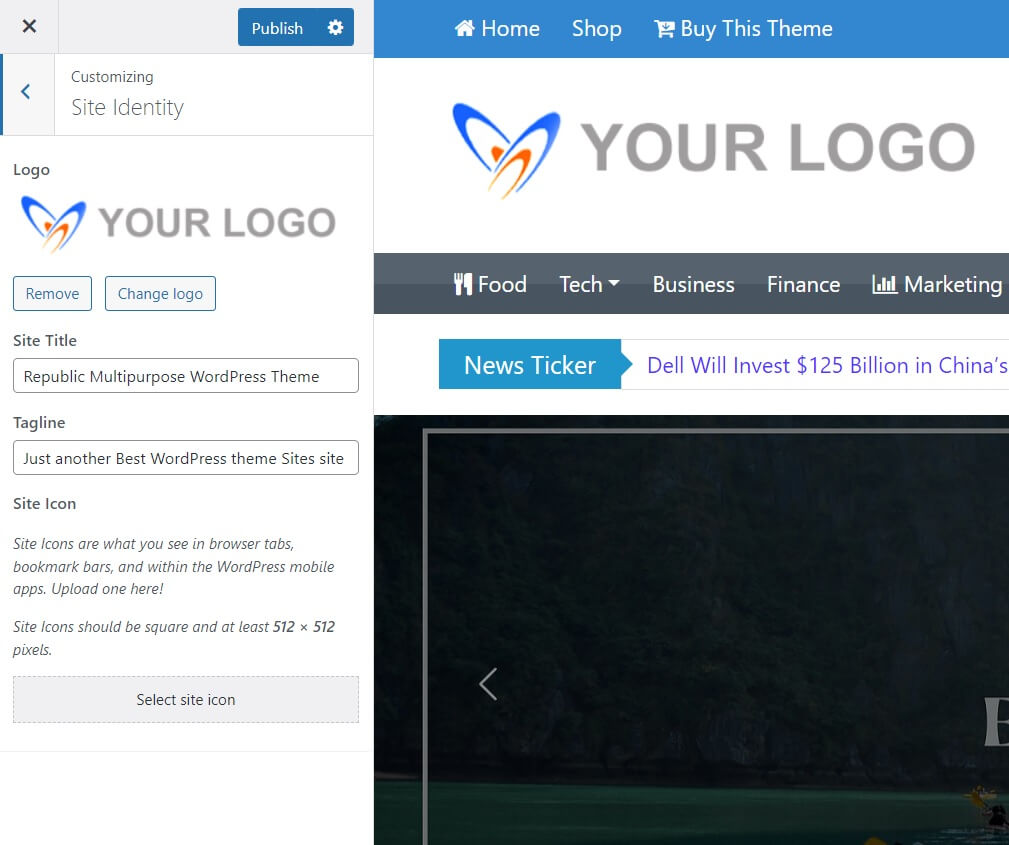
The Site Identity panel in the WordPress theme customizer also allows you to add your site logo. Simply, click on the Select logo option to upload the logo of your website.
You can do that by clicking on the Select site icon option which will show on the browser tab icon.
The Menus panel allows you to create navigation menus and control their location on your website.
On this tab, you’ll find all existing WordPress menus that you’ve created previously. You can click on the “View All Locations” button to check the available menu locations that your theme supports.
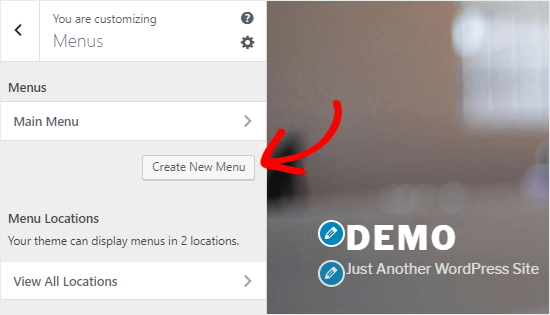
To create a new menu, you need to click on the Create New Menu button.
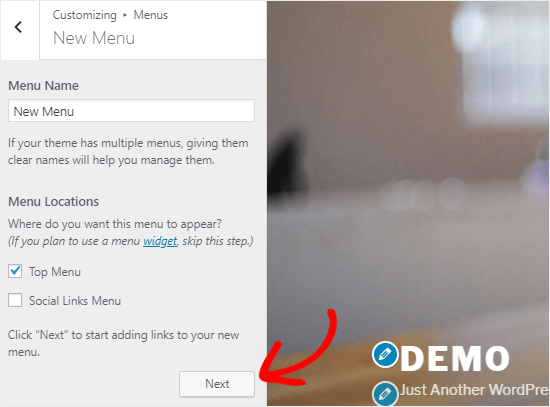
After that, you will need to give a name to your menu, so you can easily manage it later. You can also select the menu location and then click on Next to proceed.
To add items to this menu, you need to click on the Add Items button to open a new panel. You can now add custom links, pages, posts, categories, and tags as menu items.
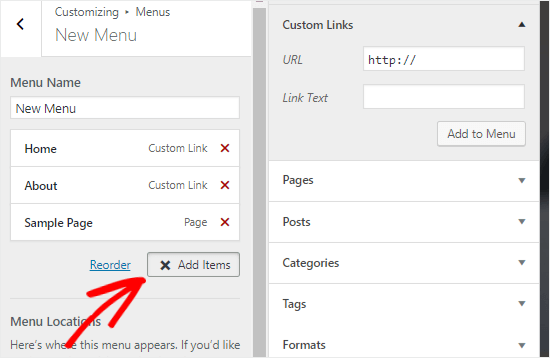
To reorder the items, you can click on the Reorder link and then use the arrow icons to adjust the menu items.
Adding Menu in Short:
Before you create your menu for this theme, make sure your pages/sections have been created already. This way they will be available to be inserted into the menu.
Follow these steps to create a menu:
- Go to Appearance> Menus in the main admin menu.
- At first, you will probably need to add a menu (create a menu), give it a name, and click Save Menu.
- The new menu will appear in a tab in this location. Click on this tab to begin adding menu items.
Use the dialog boxes on the left-hand side of the page to add items to your menu. - Select the master page you created as well as all of the sub-sections or child pages and click “Add to Menu”.
- Now you can drag the newly inserted menu items to their correct sequence and rename their titles if required.
- After you have added and edited the menu items click Save Menu in the bottom of this area.
- Adding the menu to the theme
Finally, you will need to specify the location for this menu. Select the menu for Primary, Main or Footer menu and check the box where you want to display it, and click Save Menu.
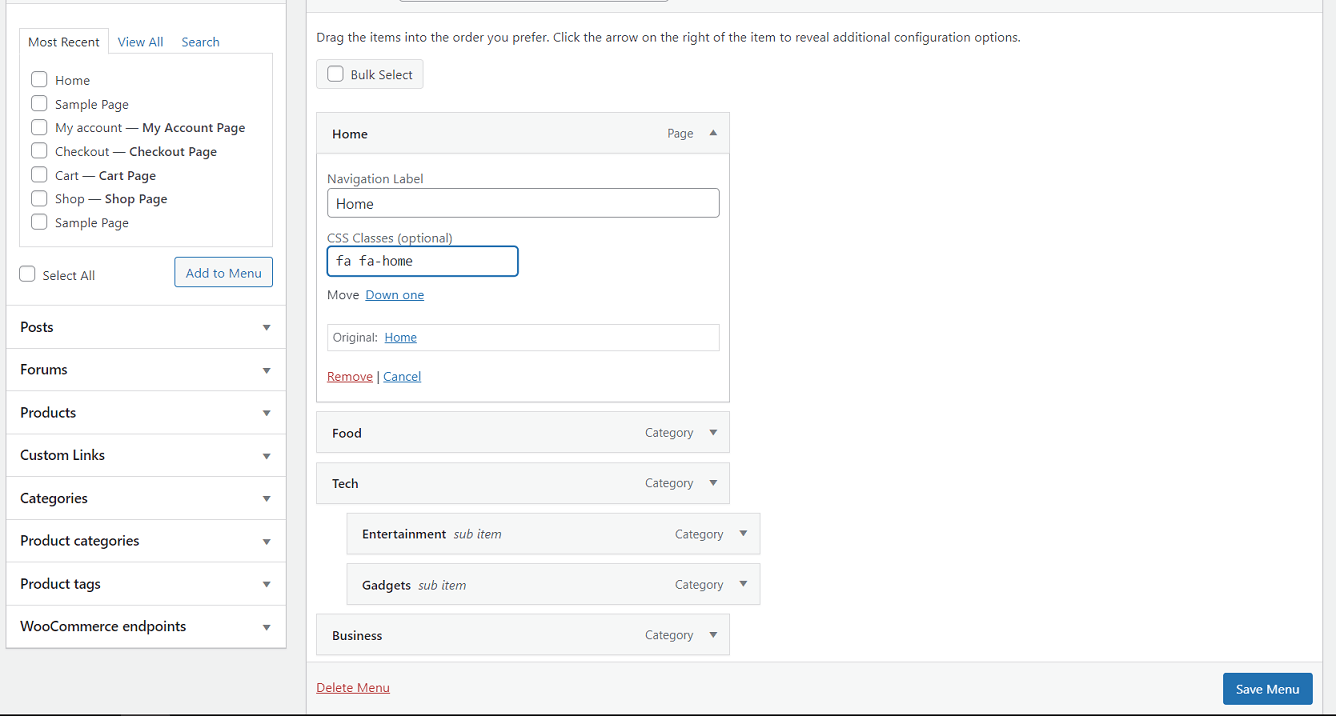
You can now easily add Font Awesome icon to Menu just navigate to Dashboard > Appearance > Menu > Here from top Right “Screen Options” Check and Enable “CSS Class” like Shown in below Image.
After you enable Now open Font Awesome website https://fontawesome.com/v4/icons/ and search for your favorite icon
Open icon and copy icon code as shown in below image.
Now paste that code into CSS Class field and Save Menu. That’s all
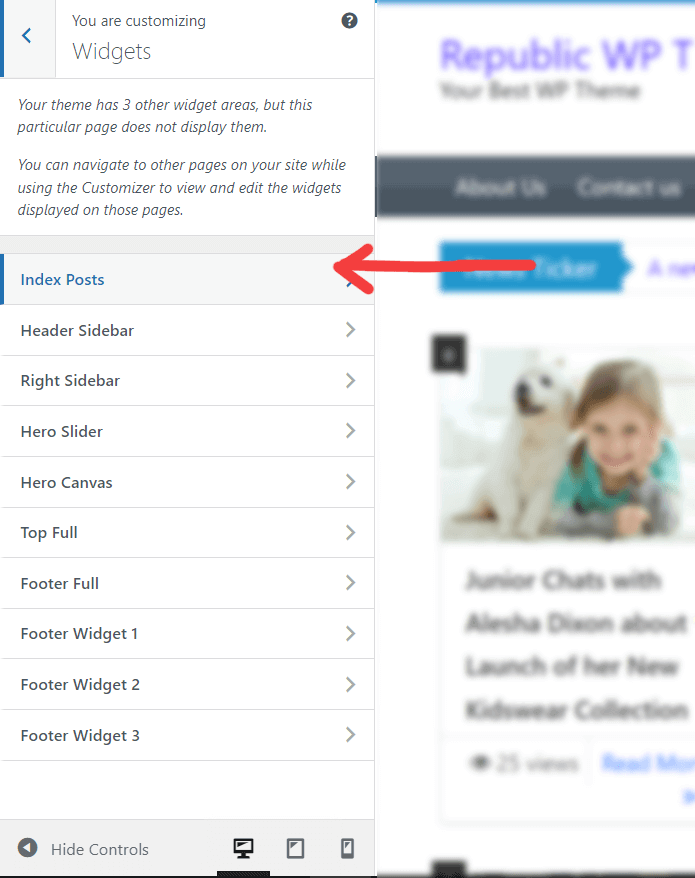
To add a widget to Index page and show posts from a particular category you can just follow the below steps.
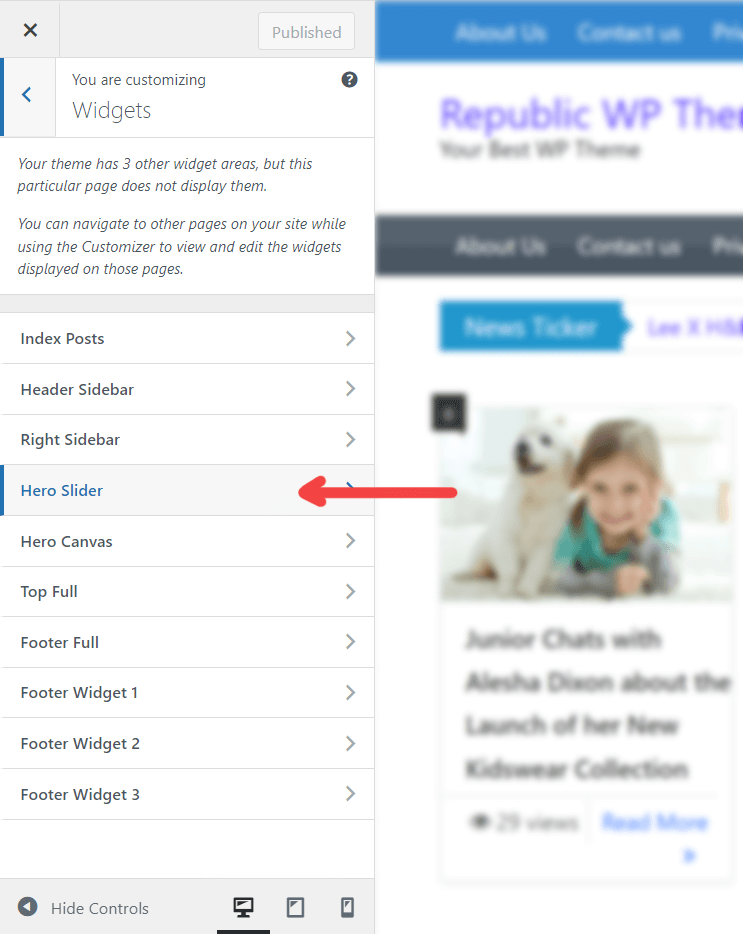
Now select Index Posts widget are Or anywhere you want to show it like in the header or footer.
Now click on + icon to add widget and search for theme widget related to theme name, Our every theme has custom widget design for our theme. Now choose Index Posts widget
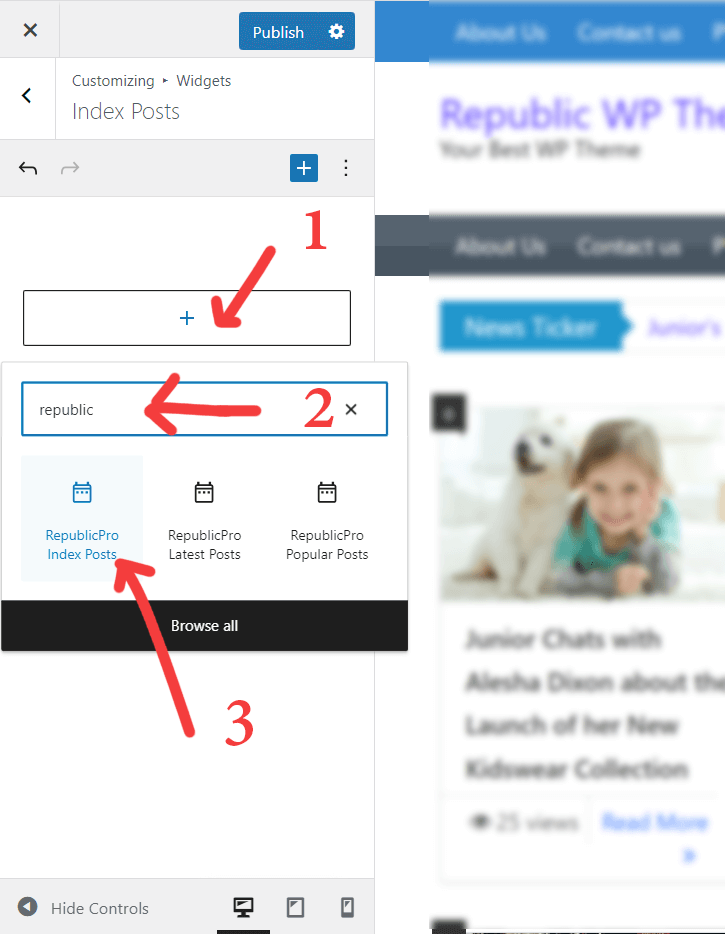
After adding widget you will able to customize it according to your requirement and easily step shown in below image.

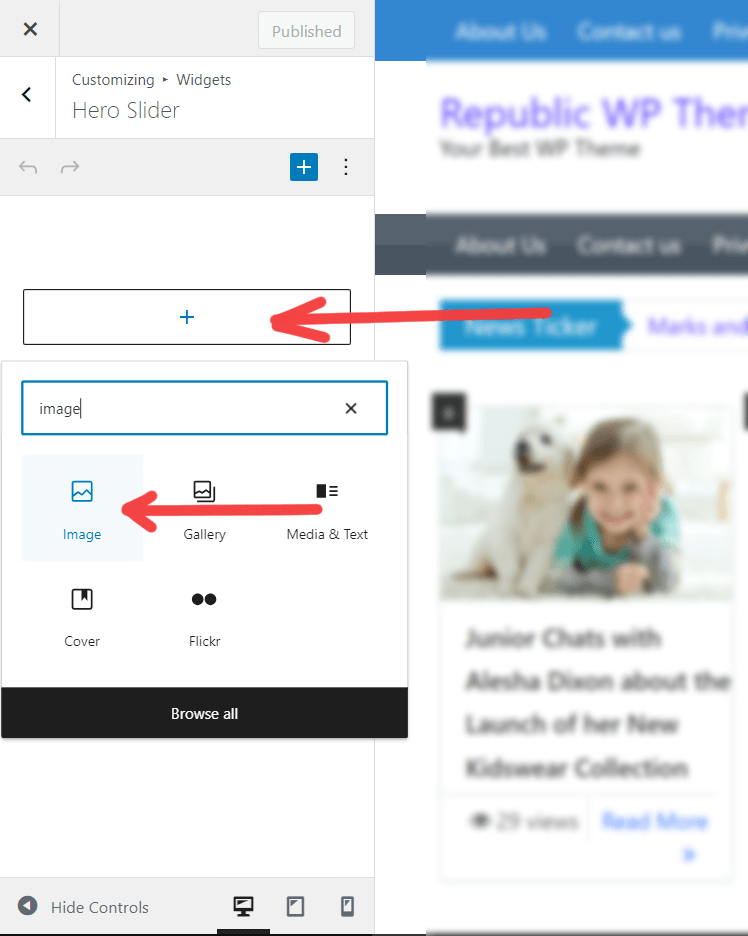
You can add your own custom slider to the theme without any plugin
-
Select Hero Slider Widget from the slider
2. Select Image Block for slider to select image
3. Image upload is done and it will be shown in slider Choose the width around 1920px
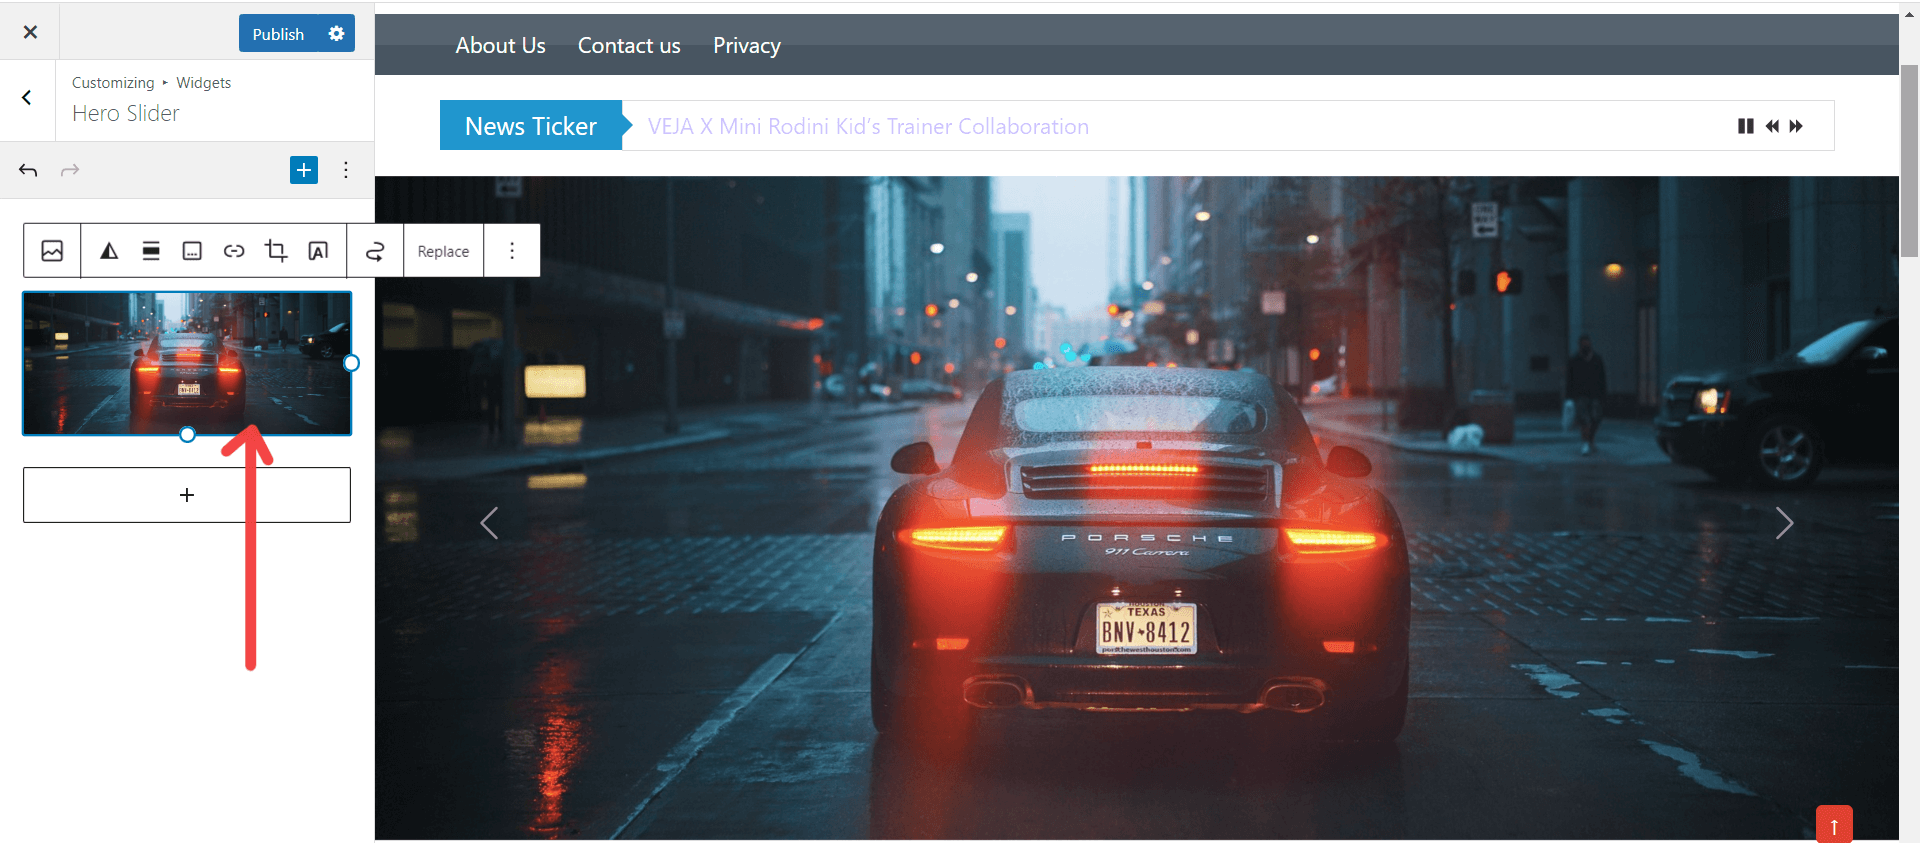
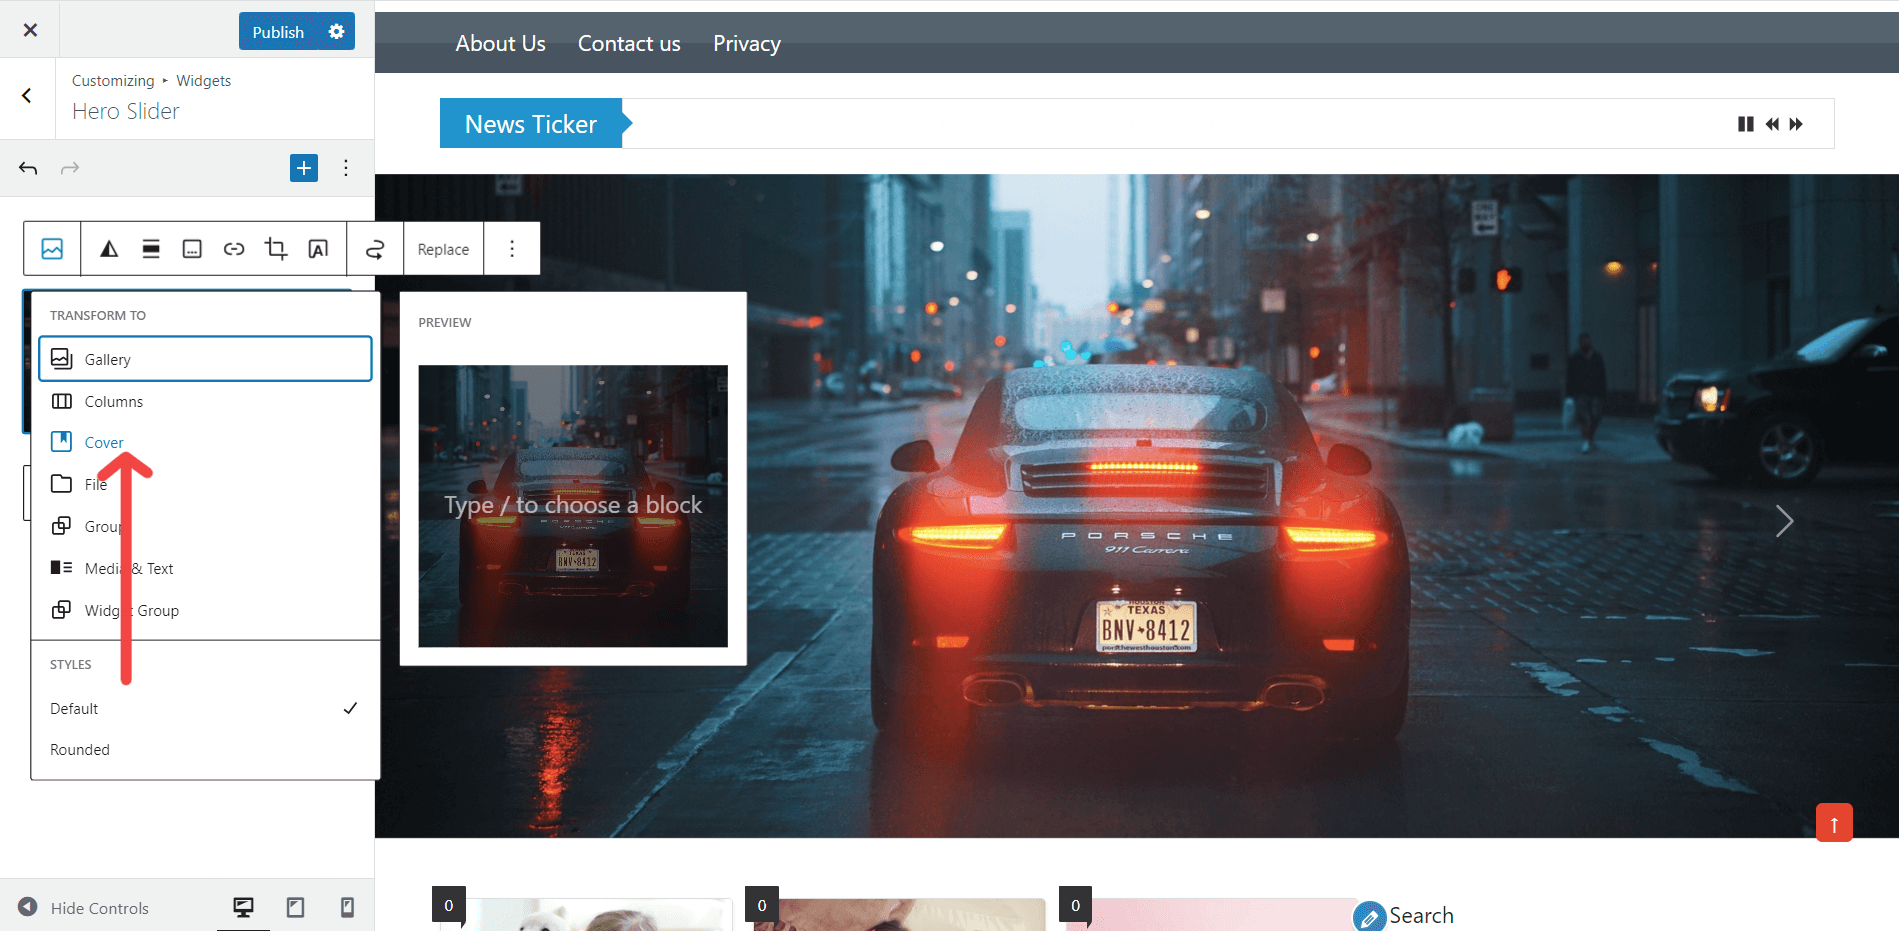
4. Making Image as Cover and Add Caption – Click on the Image icon from option then select cover (shown in below image) (Optional)
5. Add a caption on the image write anything you want.
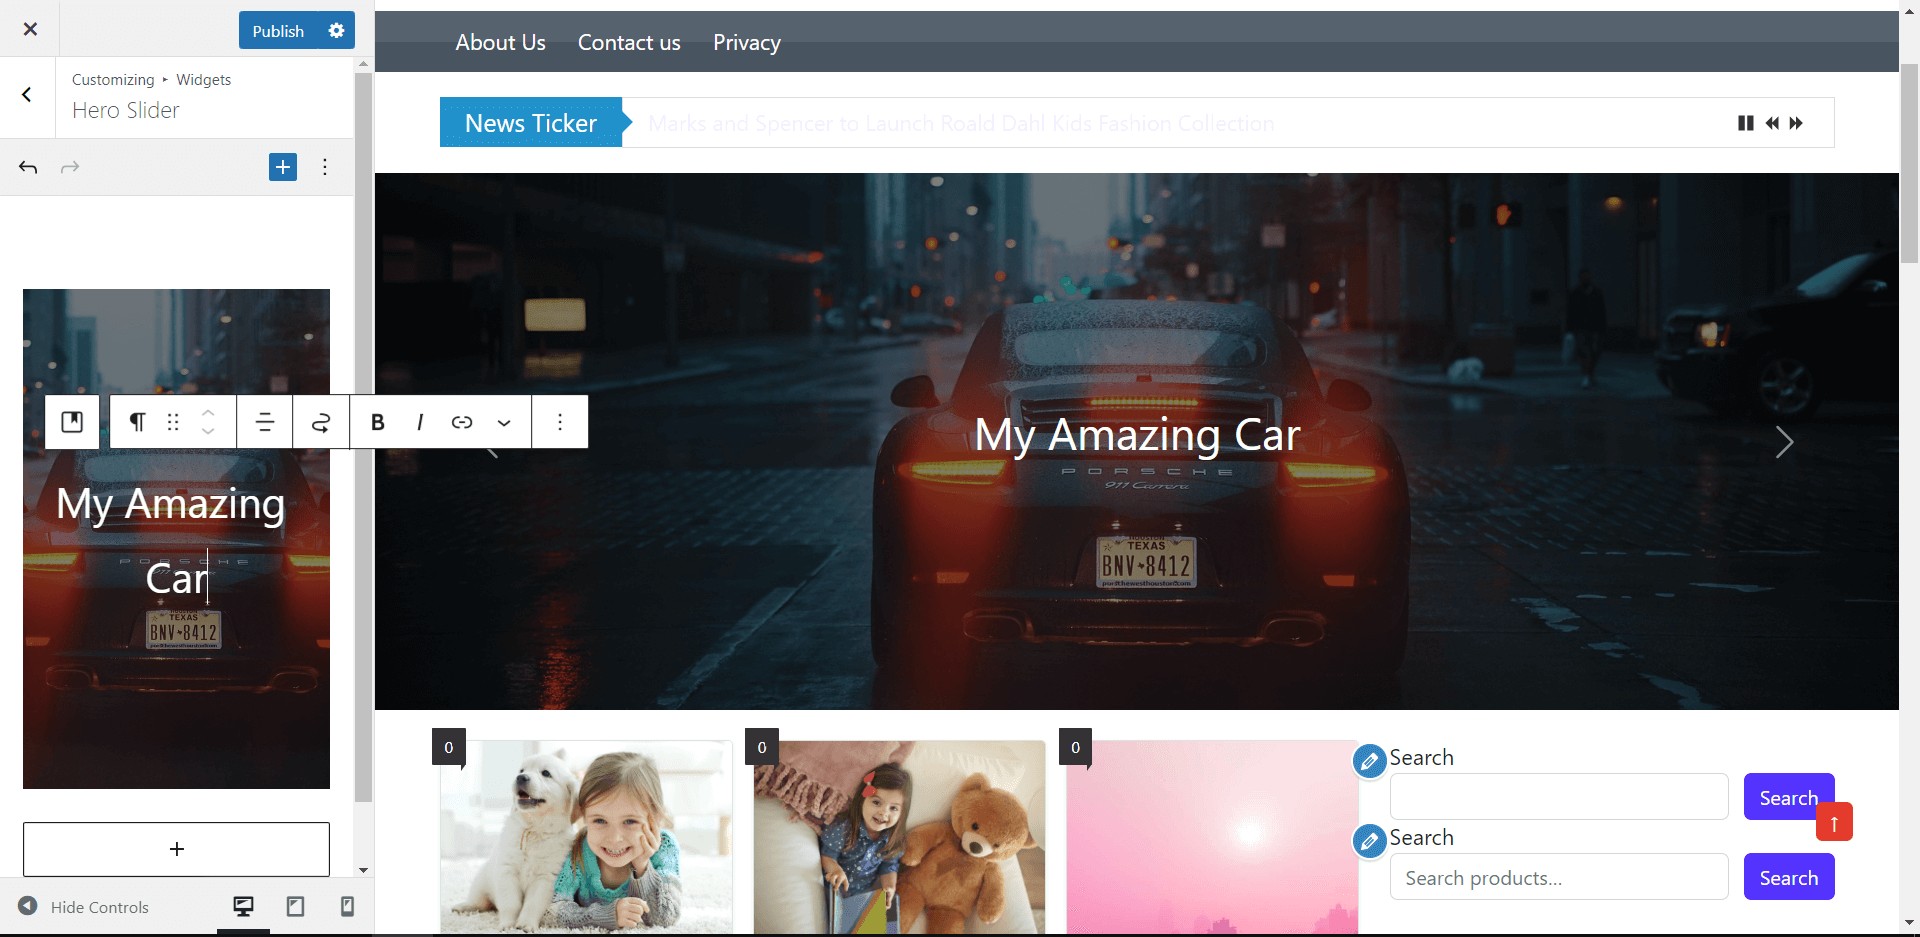
6. Add more images using same process add a new image block and repeat same
You can add your own custom canvas to the theme without any plugin
-
Select Hero Canvas Widget from the menu

2. Select Image Block for Canvas to select an image – you can upload, choose from media file or URL
3. Image upload is done and it will be shown in Canvas Choose the width around 1920px
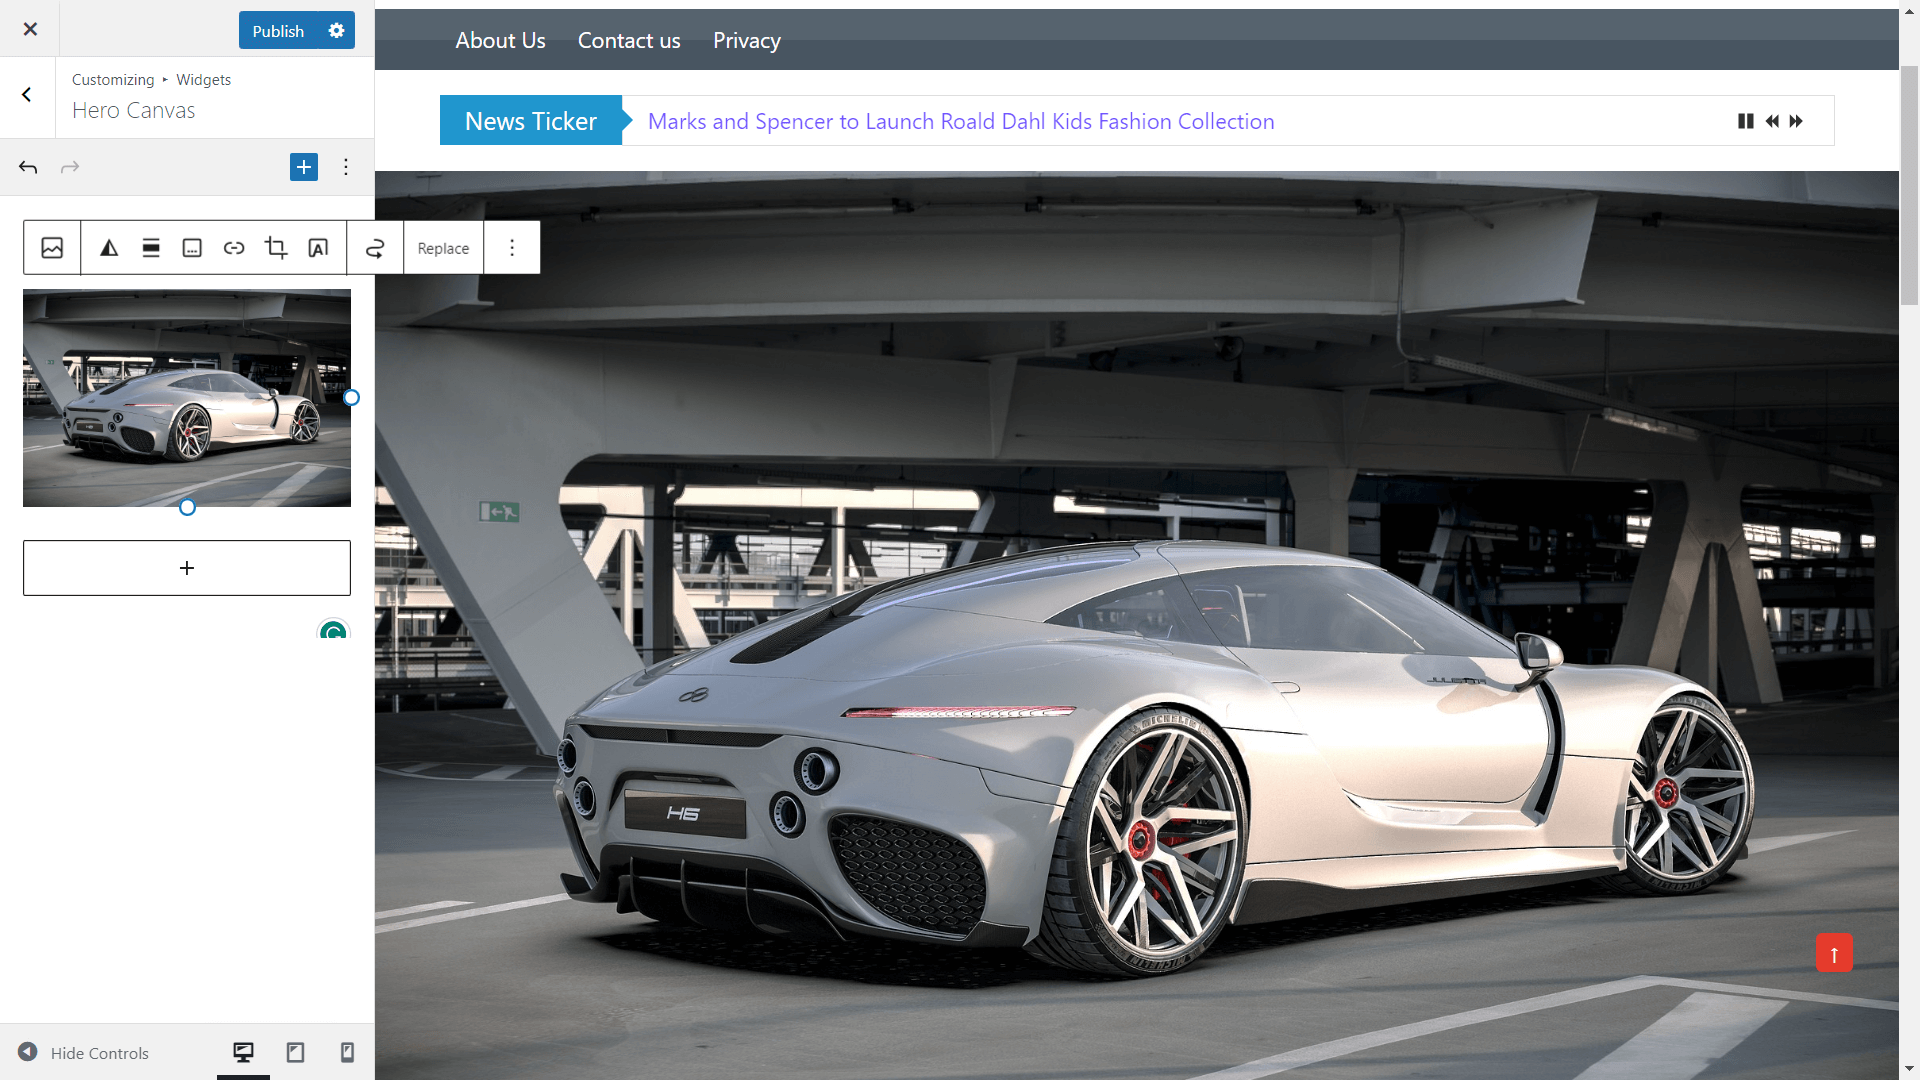
4. Making Image as Cover and Add Caption – Click on the Image icon from the option then select cover (shown in the below image) (Optional)
5. Add a caption on the image write anything you want.
6. Add more images using same process add a new image block and repeat same
To add a widget to Sidebars or Footer or any widget area you want and show posts from a particular category you can just follow the below steps.
Click on (+) Add widget icon and search for Republic Latest Posts or Republic Popular post widget.
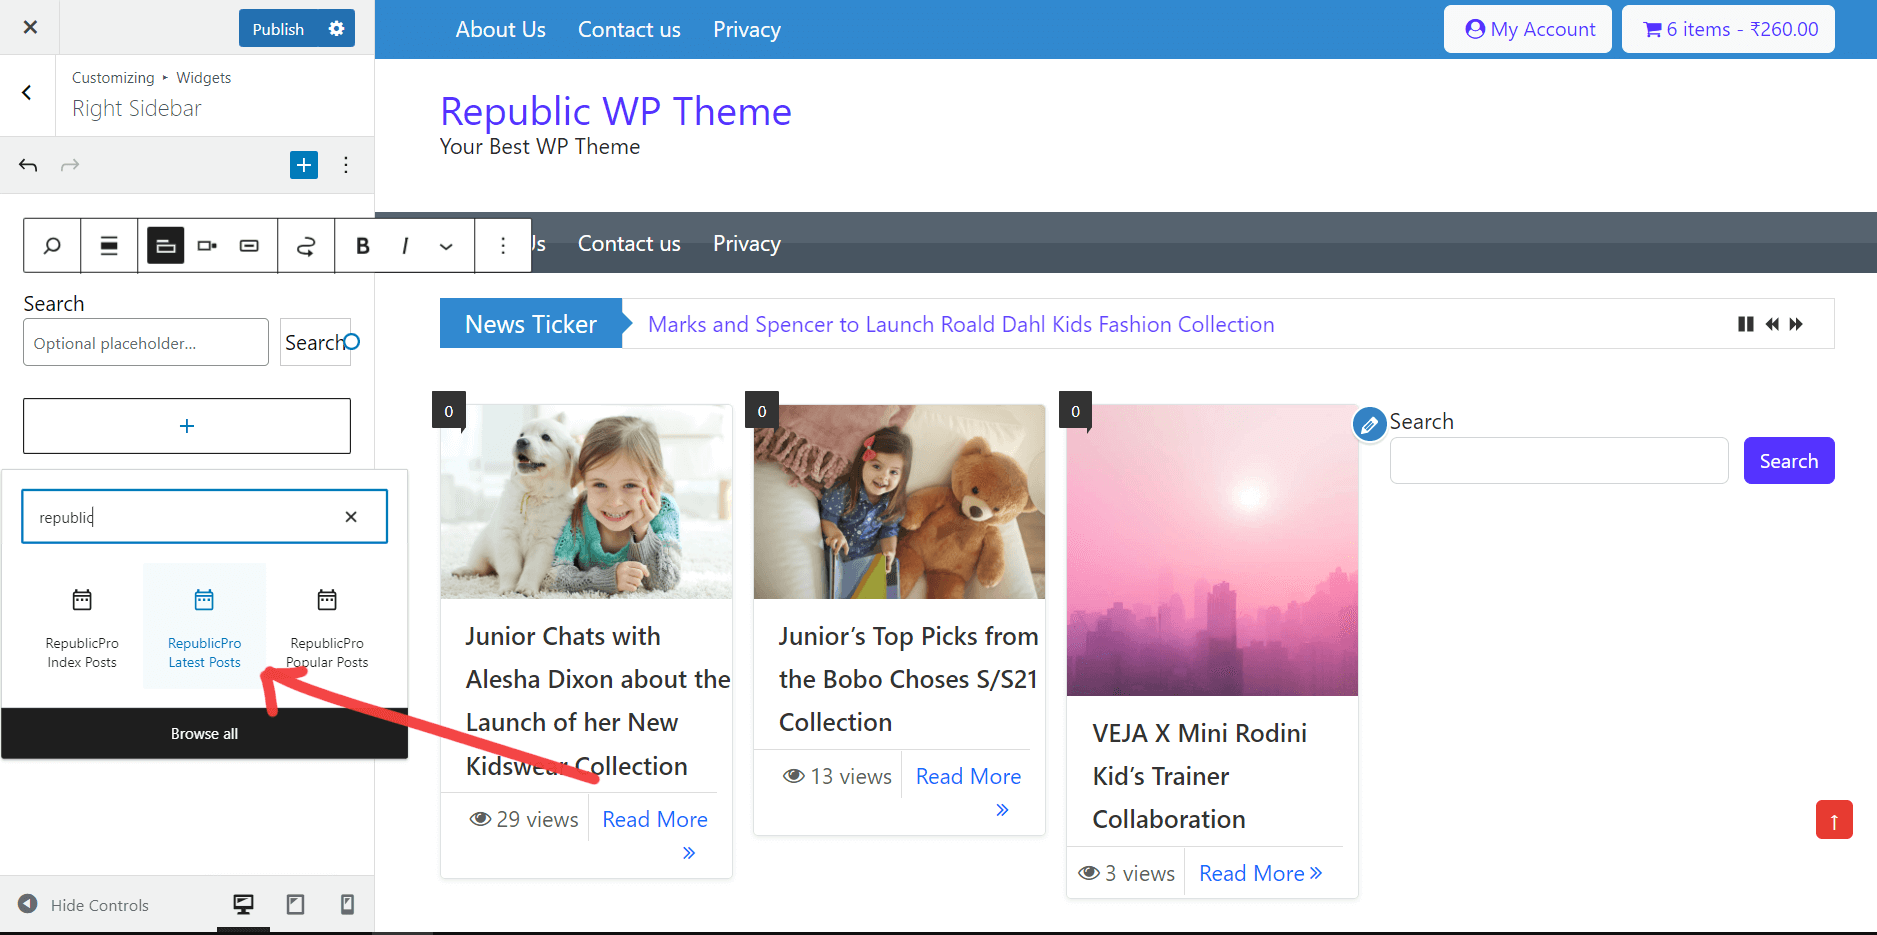
After adding widget you will see the preview
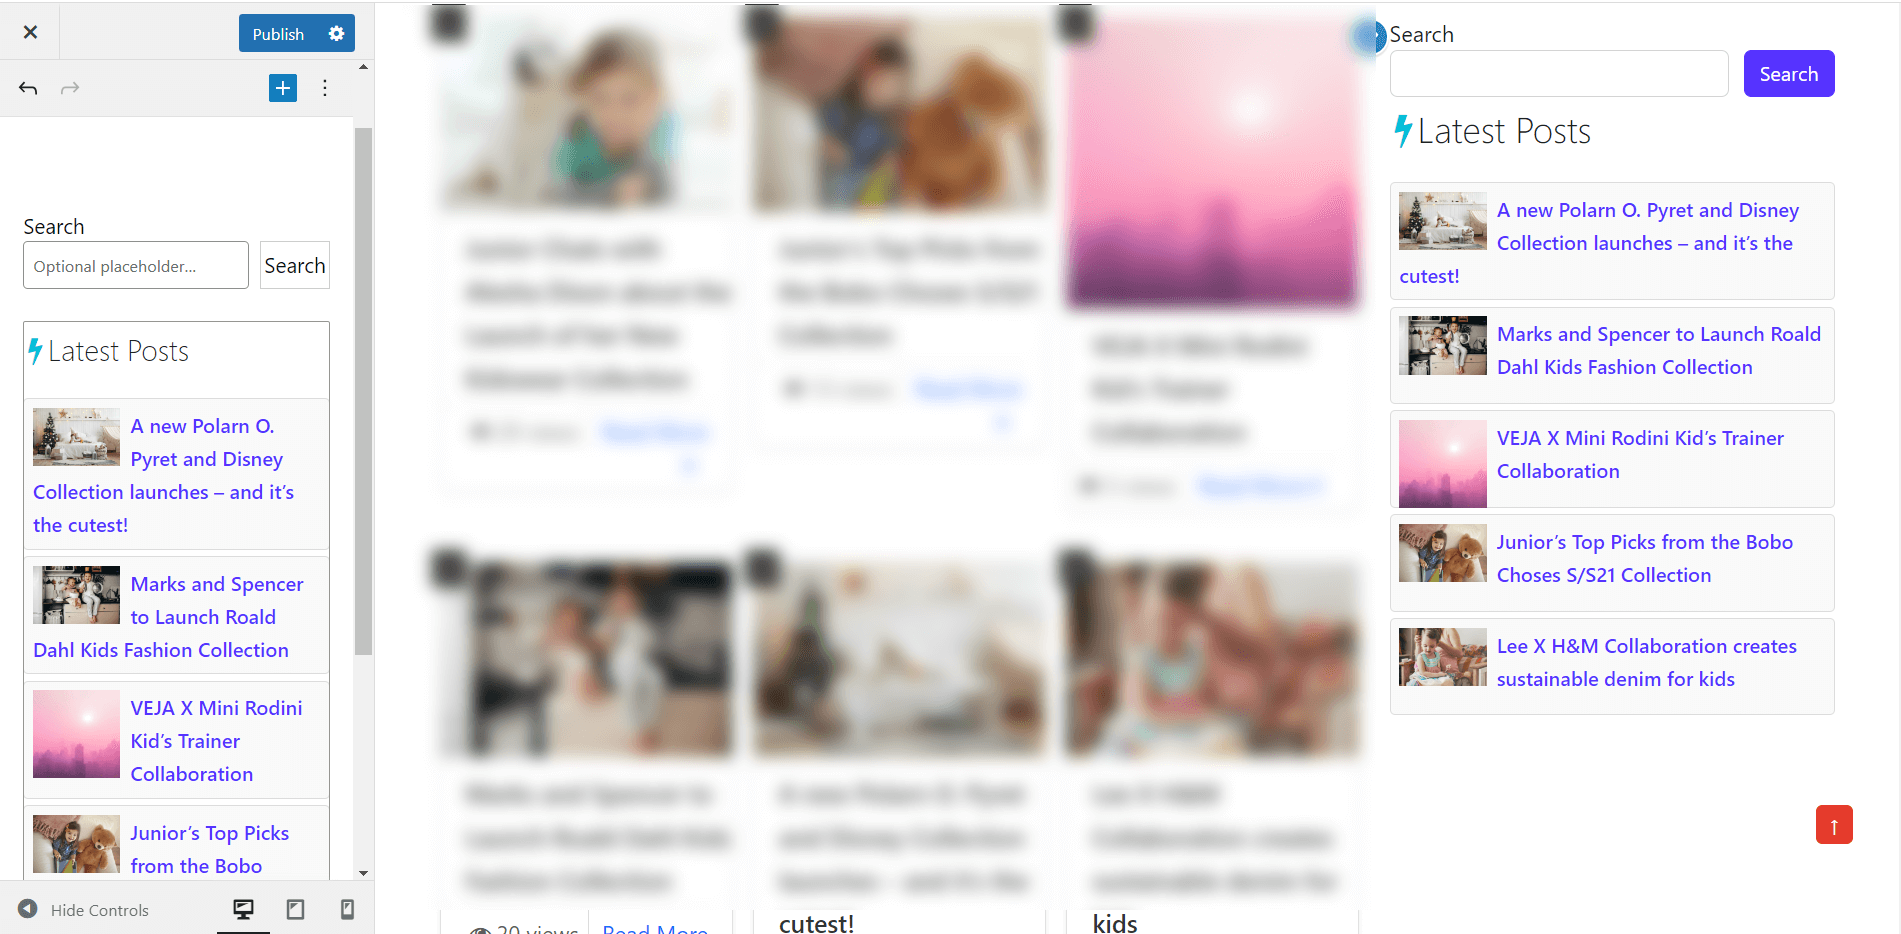

Options to control Republic Latest Post Widget
- Widget title – To change widget title
- Choose a category or Select all categories to show latest posts from
- Featured image or Thumbnail control
- Numbers of latest posts.
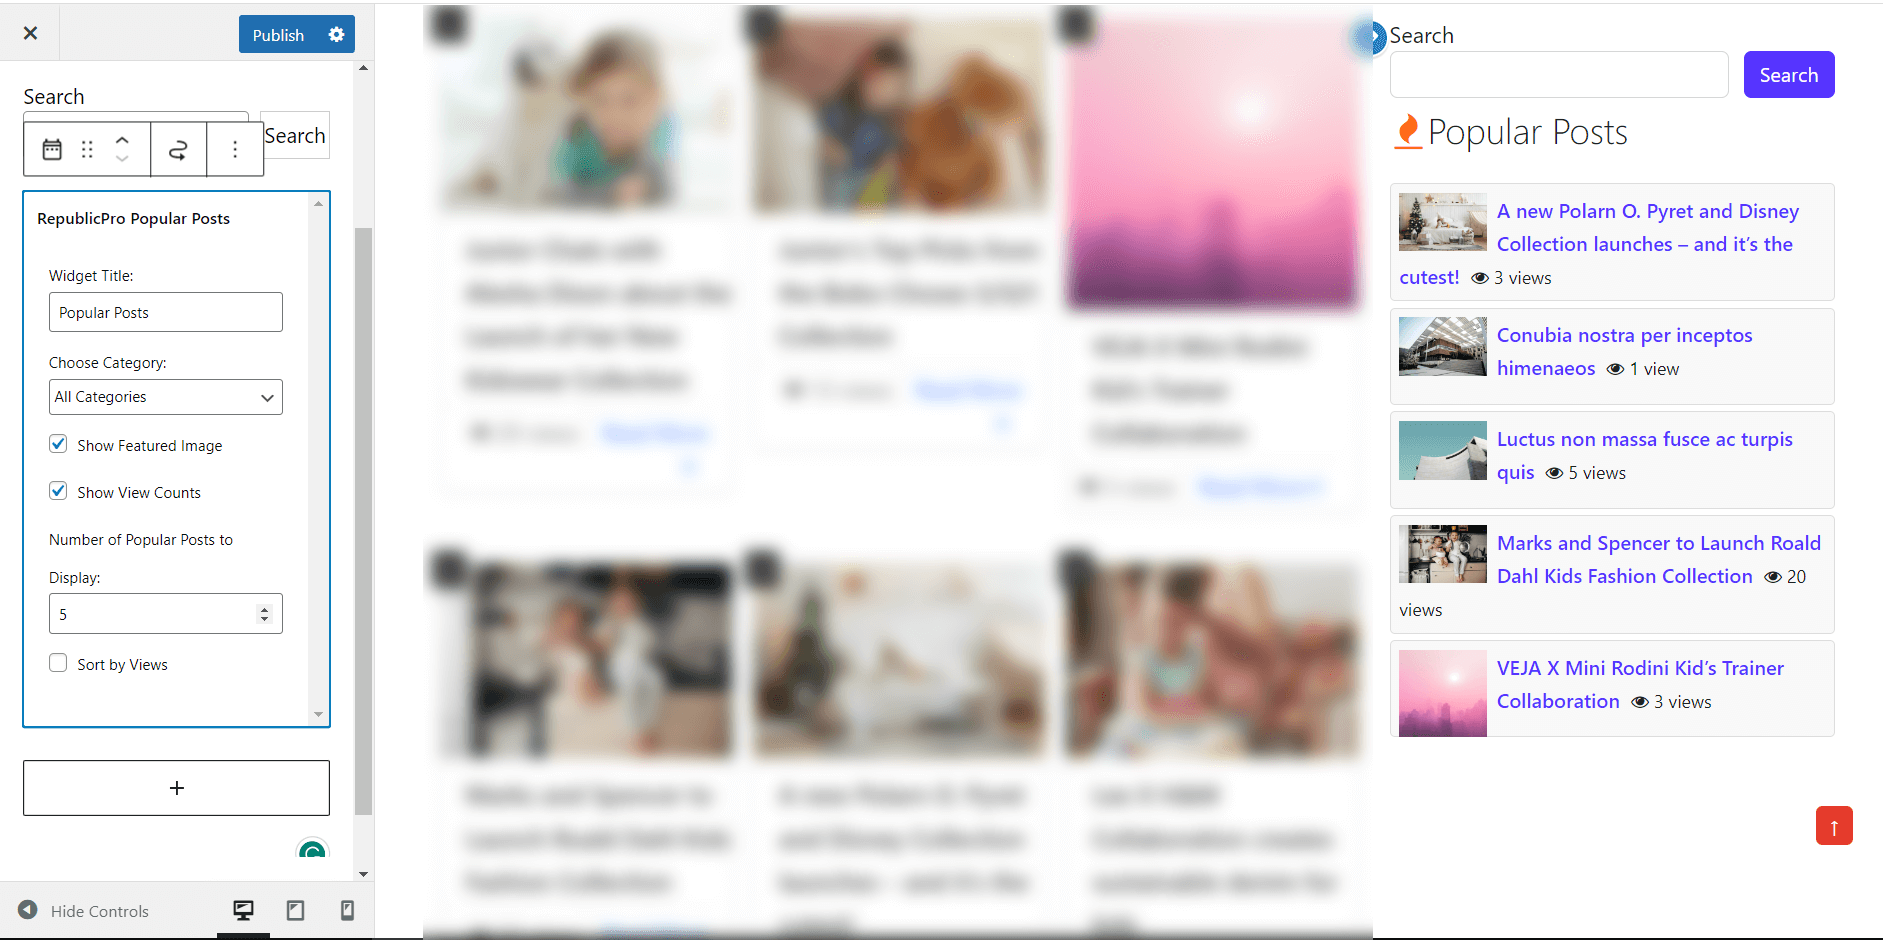
Options to control Republic Popular Post Widget
- Widget title – To change widget title
- Choose a category or Select all categories to show popular posts from
- Featured image or Thumbnail control
- Show the view count.
- Number of popular posts.
- Short Popular posts by numbers of view.
You can select individual post or page layout styles from any post while editing or creating new post, by selecting style from right side as shown in the picture
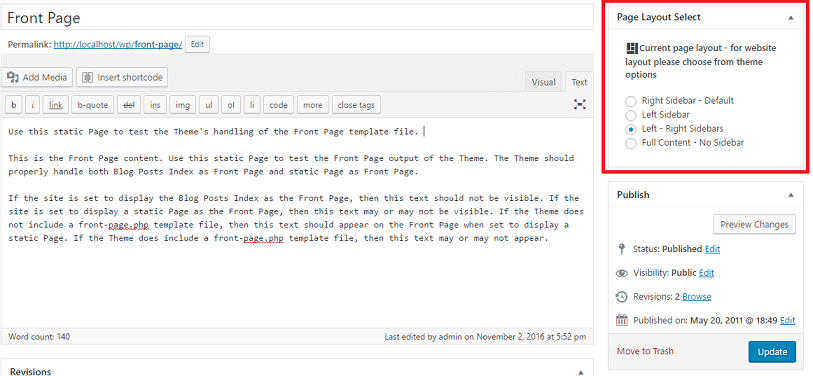
If you want to change layout of whole website then go to Theme Options and change layout from there if you selected single post then it will not overwrite settings.
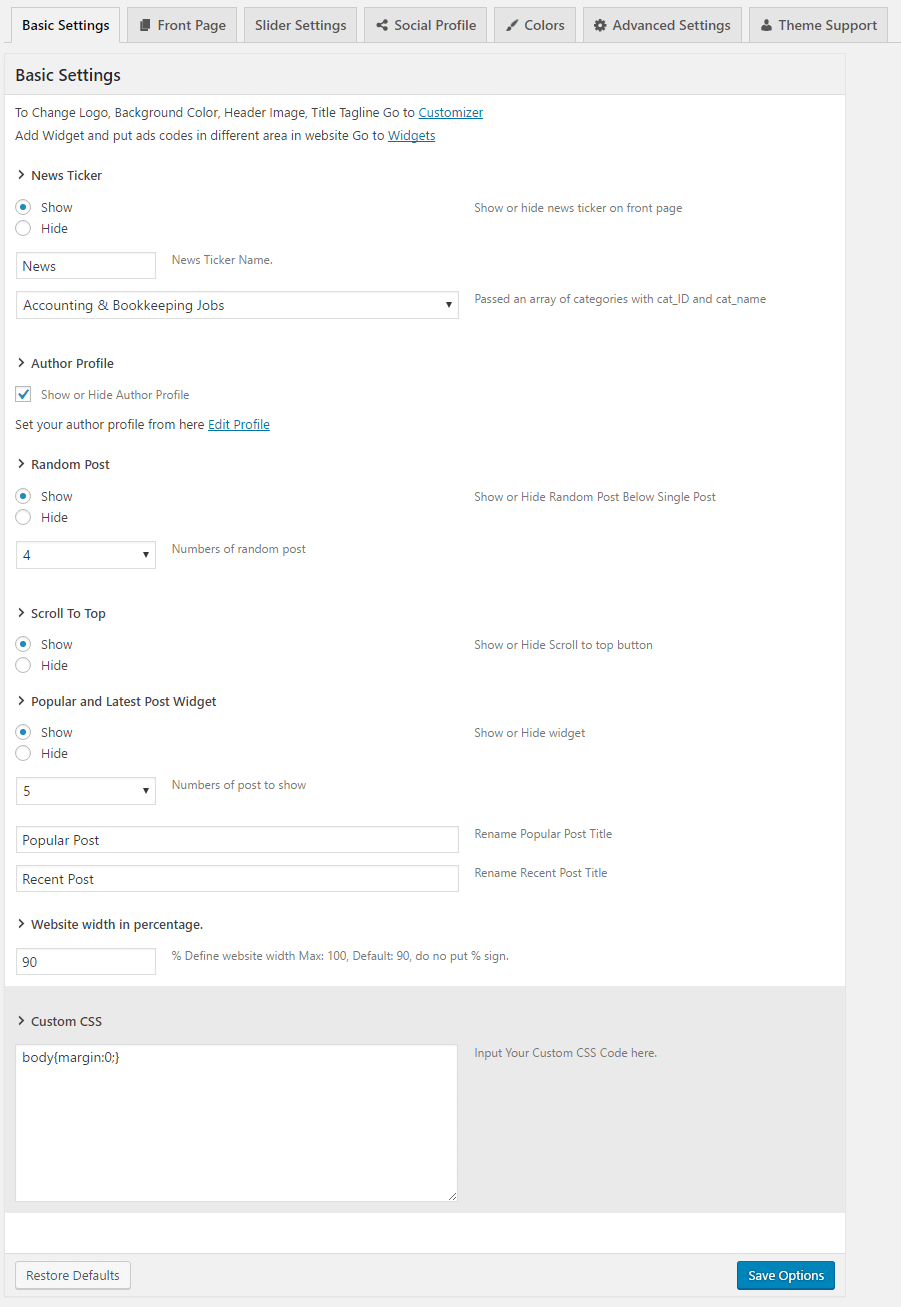
Basic Settings
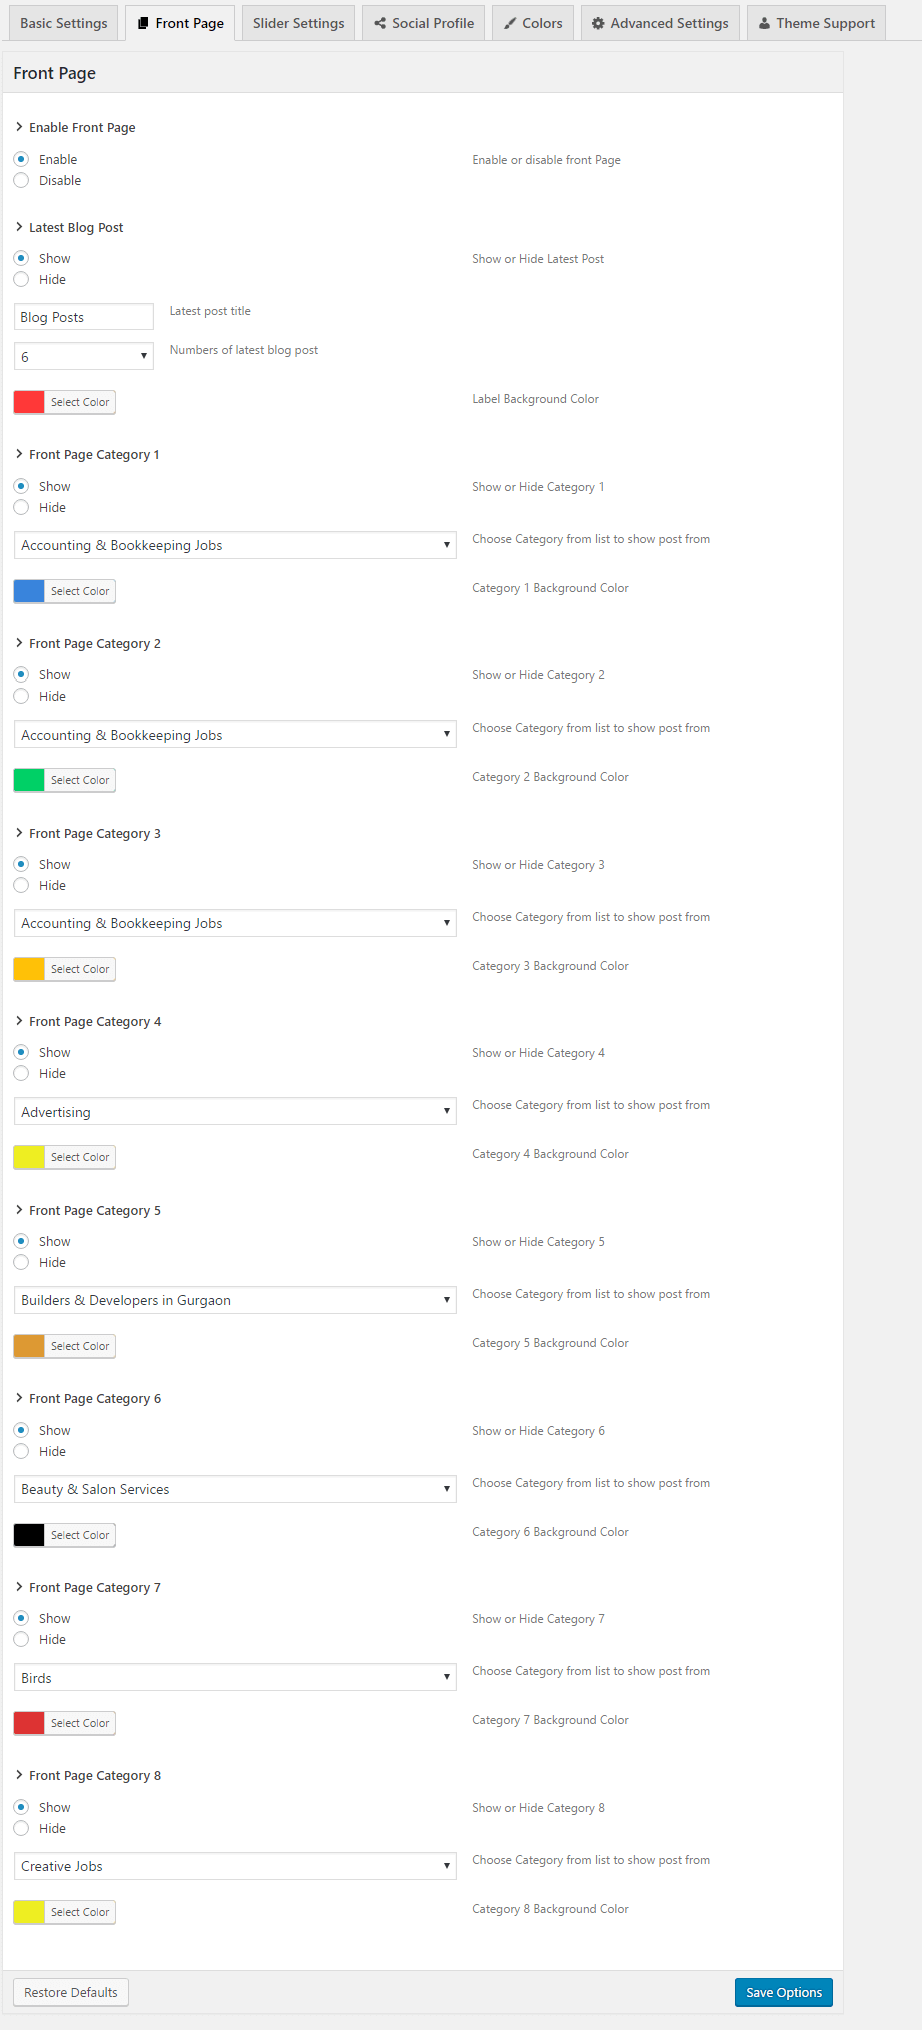
Front Page
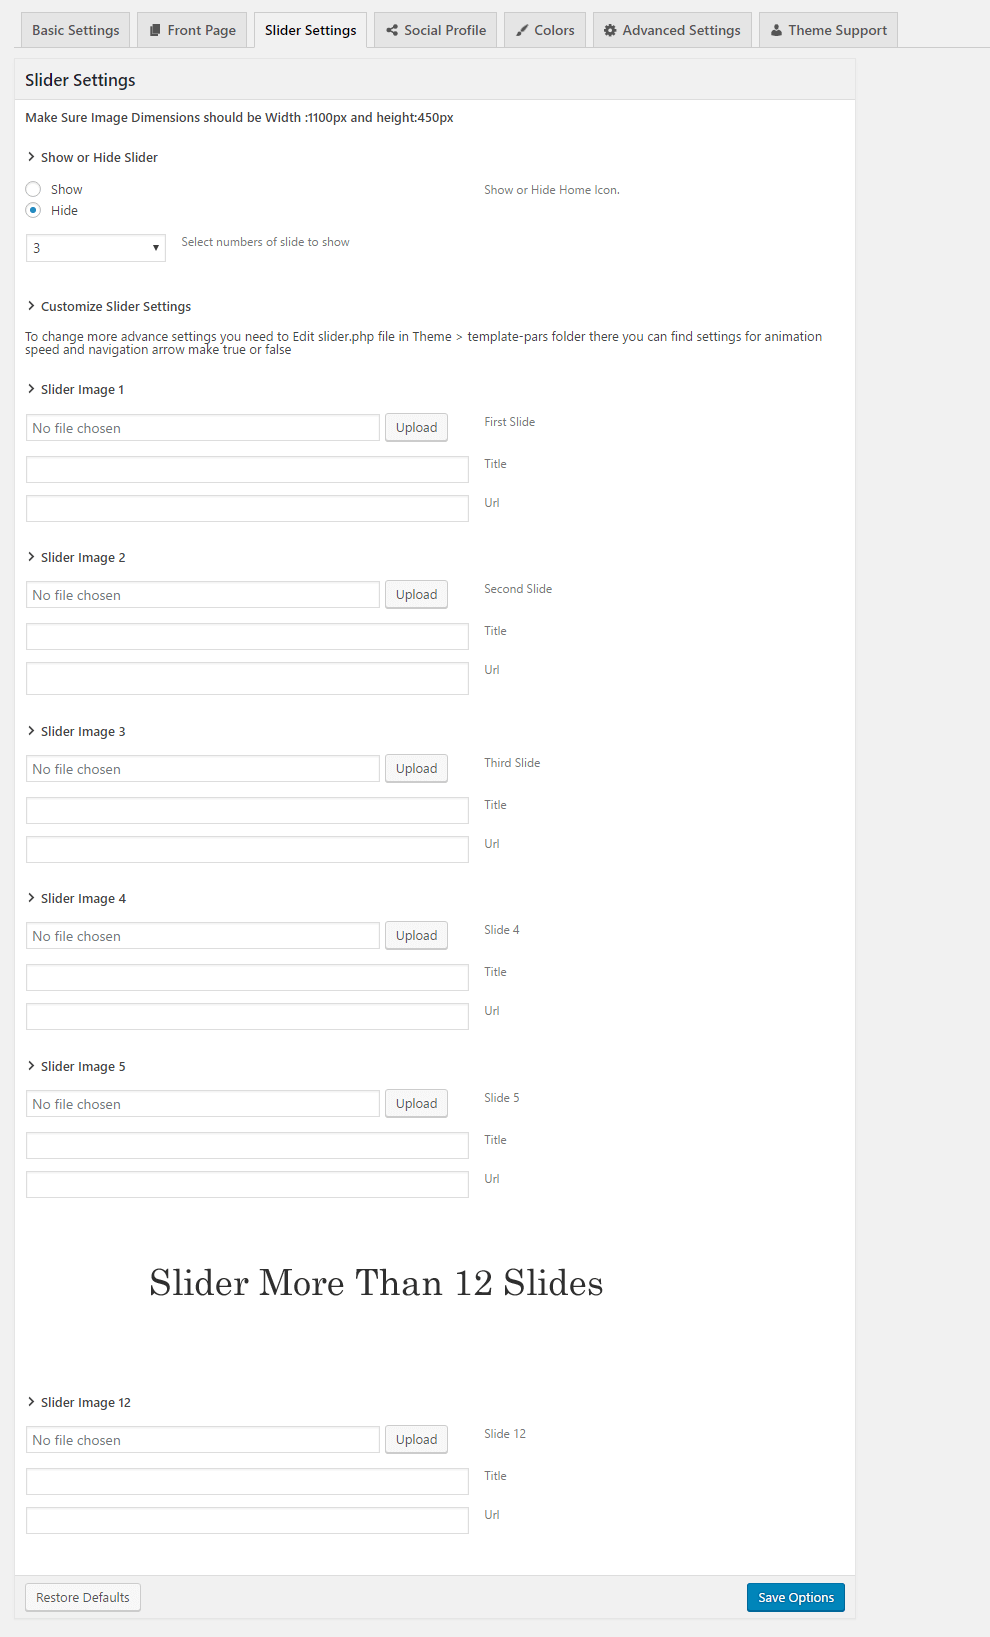
Slider Settings
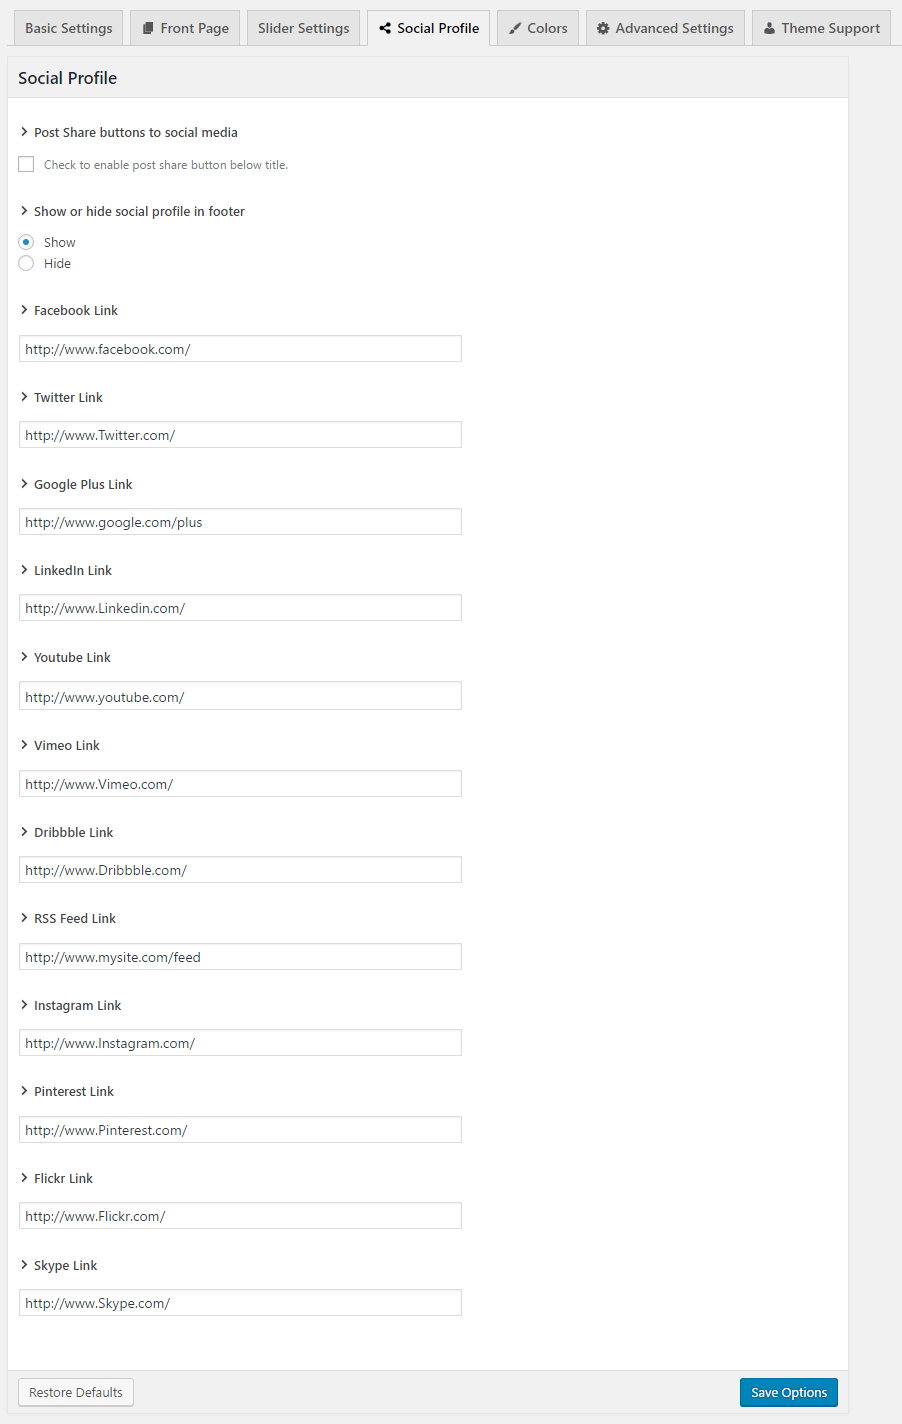
Social Profile
Colors

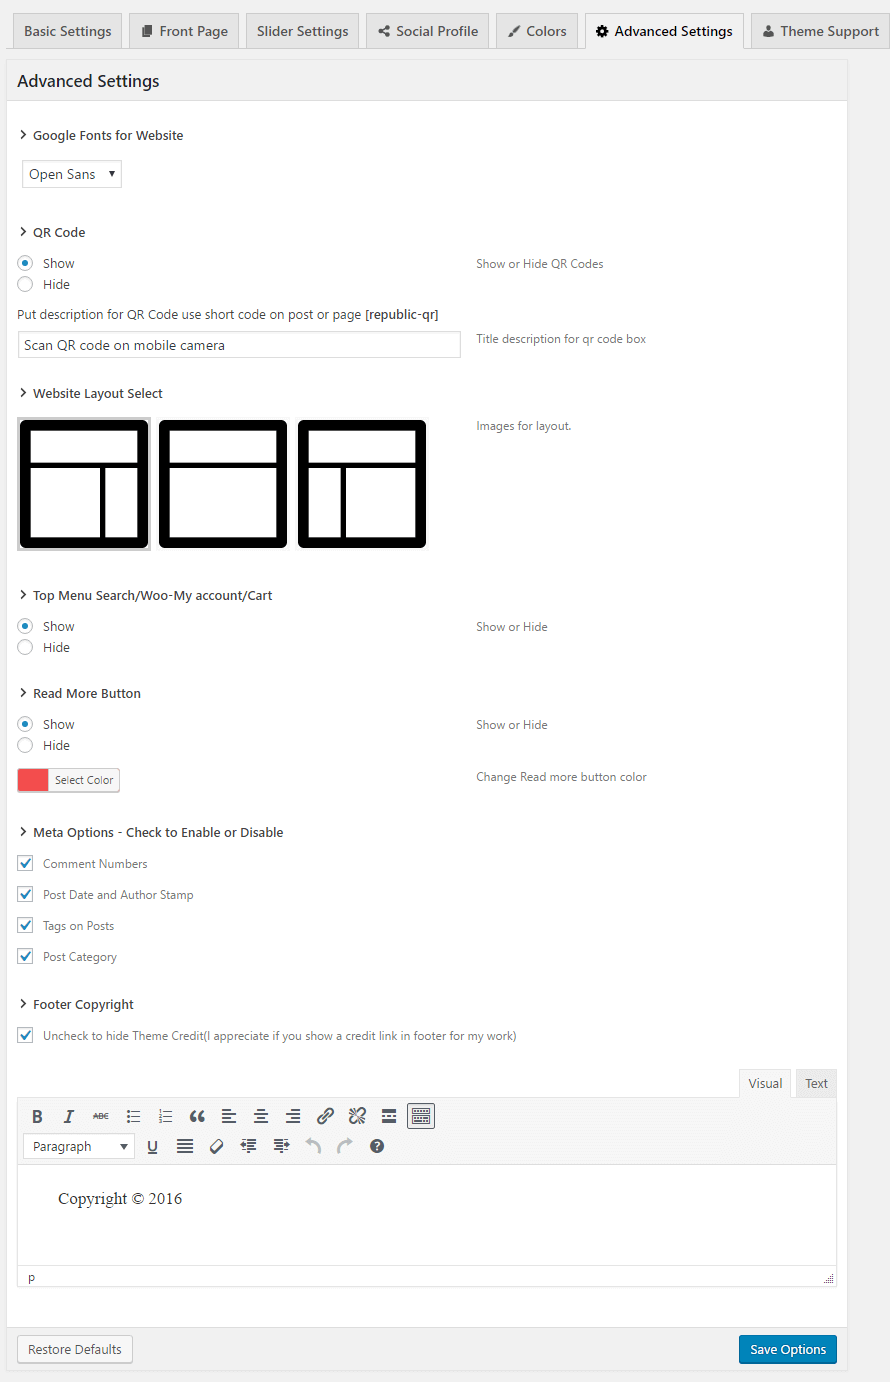
Advance Settings
We have updated our all theme to new panel